
Mary always wears beautiful, statement earrings, a gilded headband, and two signature rings. Occasionally she will wear a necklace as well.
Let's start with the rings. Mary always wears her signet ring and her labyrinth ring:


Read about these rings and where to purchase here
I bought some plated rings at Michael's on sale for $1.99 for a set of three. I also bought a pair of cameo charms at Hobby Lobby ($4.99 for 2 With coupon: $2.99).

I painted the charm with a mauve nail polish and a similar color acrylic paint. I also painted the rim with a gold polish. After that, I just glued the charm onto the ring plate and it's done!


Now for the crown/headband!!! I absolutely love all the headpieces in the show that all the characters wear, but my all-time favorite is this one from Jennifer Behr. (The exact headband is called "Pyrrha" and is currently sold out. You can find similar headbands on her site here)

(photo from Fashion of Reign)

(photo from Jennifer Behr)
This headband is hundreds of dollars and I thought I could recreate it. Turns out I can! The first prototype was aluminum foil. However, it was too flimsy for the layout in the original headband. I was then looking for feather charms and actual feathers, until I decided to do a test run on some Shrinky Dinks.
Taking a gold Sharpie, I drew a large leaf shape about the length of the paper. I then began to make diagonal strokes on either side of the center, starting from the center to the edge. If you go over the stroke a few times after it dries, it creates a sort of etched look:

I cut out the "leaves" and then cut diagonal cuts up and down the feathers. I also cut out a few triangular shapes to make it look more like a feather.

Bake them according to the instructions. I wanted two of the feathers to be larger so I actually took them out prematurely. Note that these will be more fragile than the other feathers.
Once they are all cooled, I colored the sides and back with the gold Sharpie before going over them with gold nail polish. I suggest doing this in a well-ventilated area or wear a mask, because the fumes can be strong. You could also spray paint them. Place them in a piece of foam to dry.
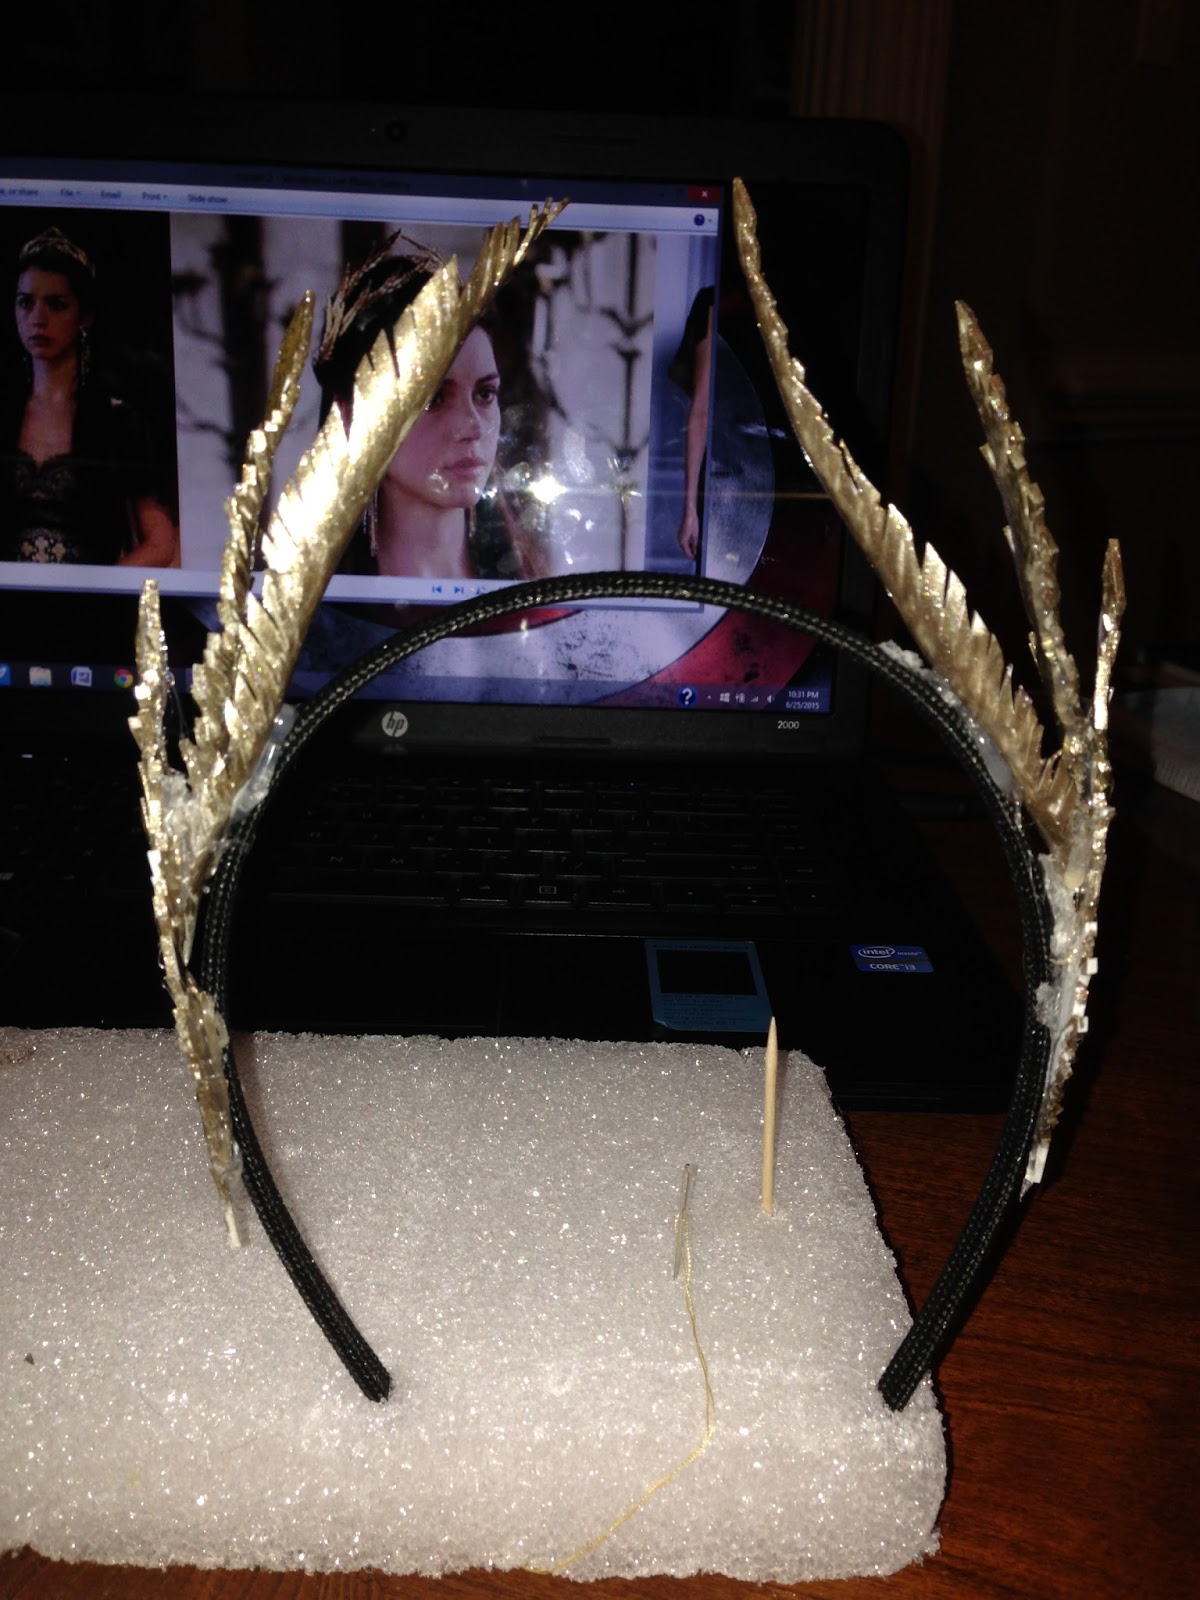
Next I bought a comfortable black headband to match my hair ($3.99 for 5). This step is important: be sure to stretch the headband to about the width it would be when on your head. If you have a foam bust, you could place it on that. I used a piece of foam and stuck either end of the headband into it.
I placed the largest (most fragile) feathers on first, only hot gluing the base so that it sticks up like the one in the picture. I then tried on the headband to make sure the tips touched when its worn. Then I put a smaller feather to cover the bottom bit of the large feather. Taking another smaller feather, I wedged it in the space between the two feathers (there should be three on each side).

For the final touch, take a bit of the nail polish and cover white areas where the paint may have peeled off. Also paint some of the noticeable glue spots.
Here is the final look of the crown/headband. Its a little taller than Mary's but I think it turned out really great!

That wraps up all of Mary's accessories. Be sure to check back on how the dress is coming along for my final cosplay!
Days until Comic-Con: 11
Cost of Accessories Supplies: $8.97
No comments:
Post a Comment